 Epic Games is adding ‘Early Access’ support for ray tracing through the DirectX Raytracing API (DXR) to Unreal Engine with the pending release of Unreal Engine 4.22. Demos dating back to GDC 2018 show impressive ray tracing results using DXR. However, UE 4.22 integrates ray tracing support into the mainline branch, making ray tracing available to the wider world.
While 4.22 is an early release of ray tracing functionality in Unreal Engine, this release already offers many ray traced effects including reflections, shadows, ambient occlusion, translucency, and global illumination. Epic has slated additional enhancements for future releases.
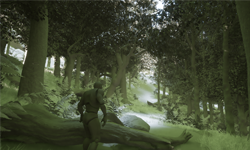
Even better, the new ray tracing functionality has already enabled new possibilities for UE4 users before today’s official release. Nexon and DevCat demonstrated a preview of their upcoming game Dragonhound at the GPU Technology Conference 2019 keynote while Goodbye Kansas and Deep Forest Films released a real-time teaser trailer for their upcoming film Troll. Both demonstrations were running on the 4.22 branch with ray tracing enabled.
All the below information applies to the initial release of Unreal Engine 4.22, and may not universally apply to future versions. Things can, and likely will, change.
Getting Started with Ray Tracing in UE4
Getting started with ray tracing for your own project is simple. Simply opt-in to the renderer settings for ray tracing and the GPU skin cache. Epic includes instructions on enabling things to test them out here, as well as a video with useful tips on using the functionality.
You can quickly try out ray tracing without changing project settings. Do this by setting the r.RayTracing and r.SkinCache.CompileShaders console variables (CVars) to 1 in the ConsoleVariables.ini file. Once done, relaunch your project with Direct3D12 enabled using the -d3d12 command line switch (only the D3D12 RHI supports ray tracing). After the shaders recompile, ray traced effects should appear.
;Quick and dirty console variables setting that enables DXR
r.RayTracing=1
r.SkinCache.CompileShaders=1
What to Expect for First Impressions
The shadows, ambient occlusion, and reflections effects all default to on in UE4 when ray tracing is enabled. Importantly, shadowing lights default to using ray traced shadows and participate in the lighting of geometry in reflections. Also, UE4 uses the material model for the current LoD when computing shading or masking. These defaults conservatively bias towards the highest quality, and as a result, do not expect optimal performance. This represents the ray tracing version of having performed no content optimizations.
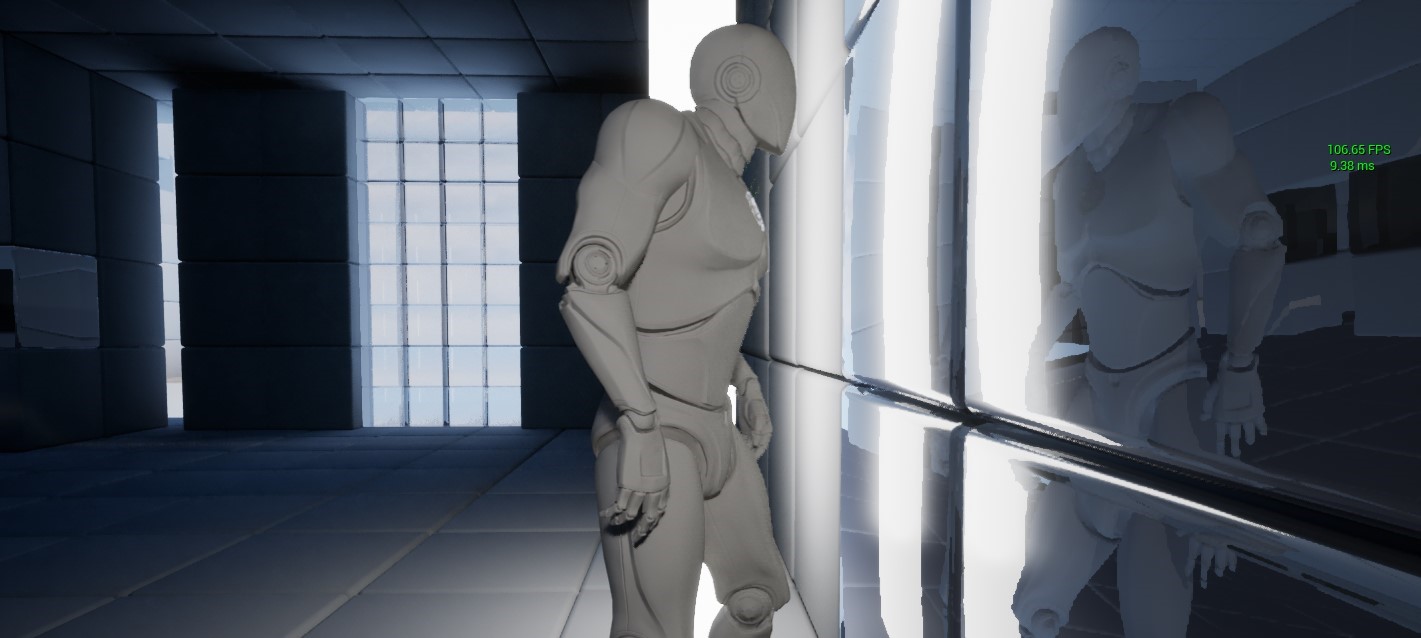
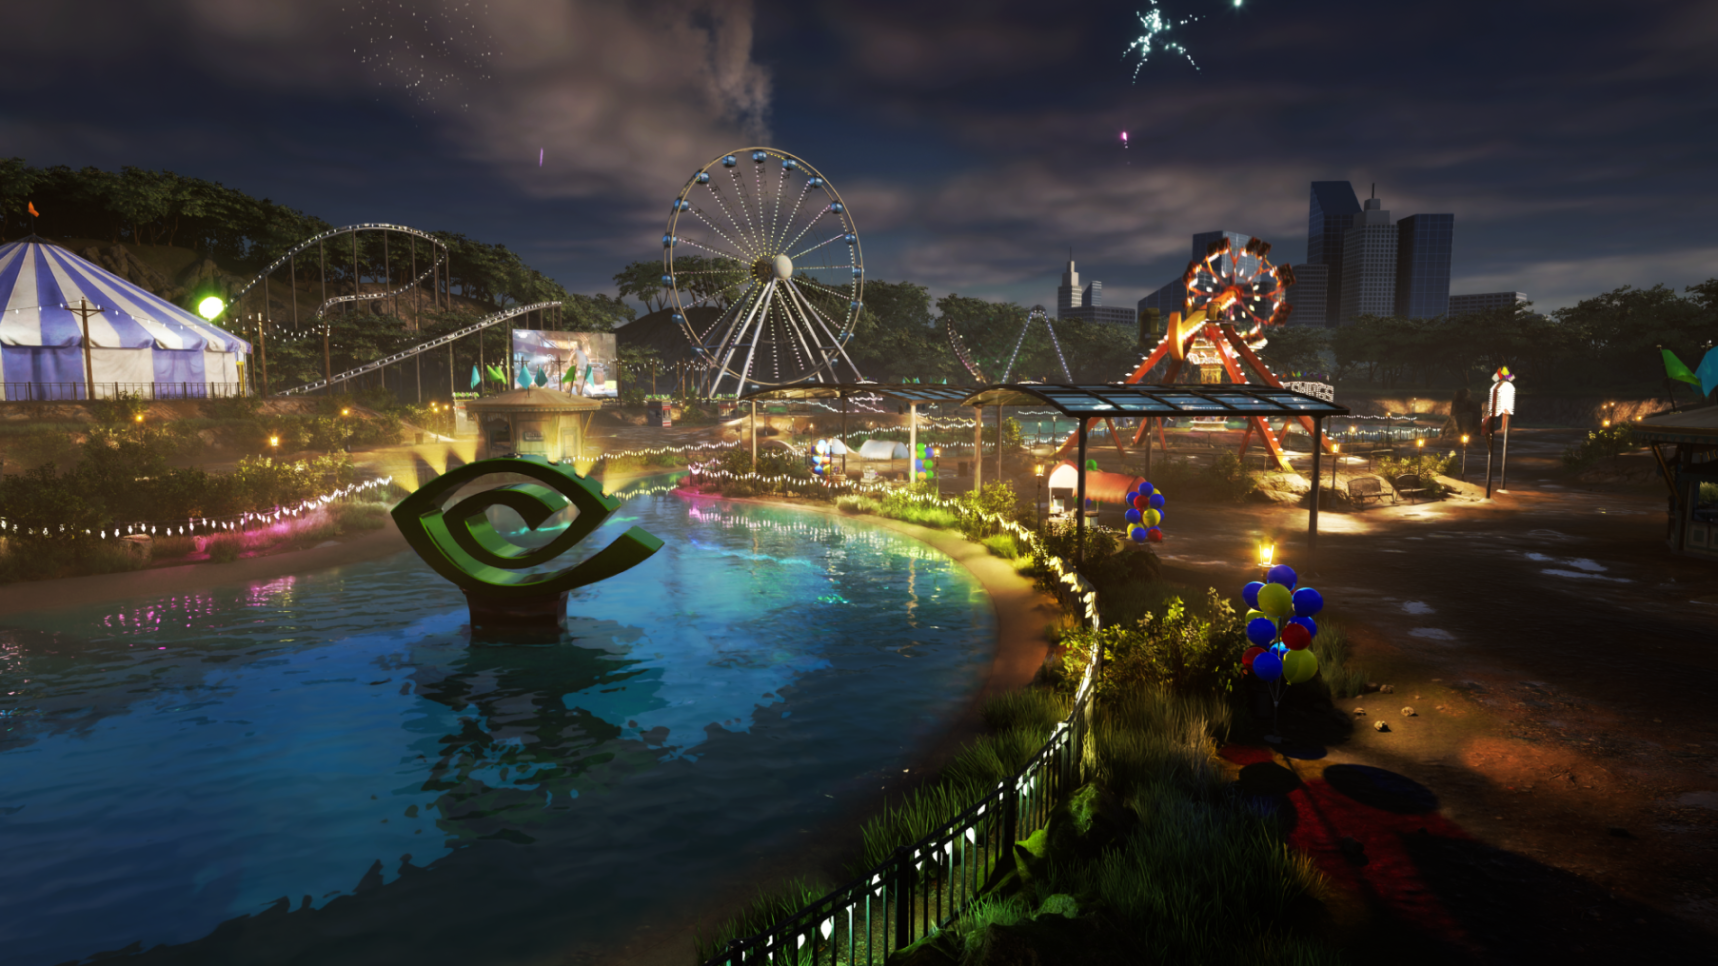
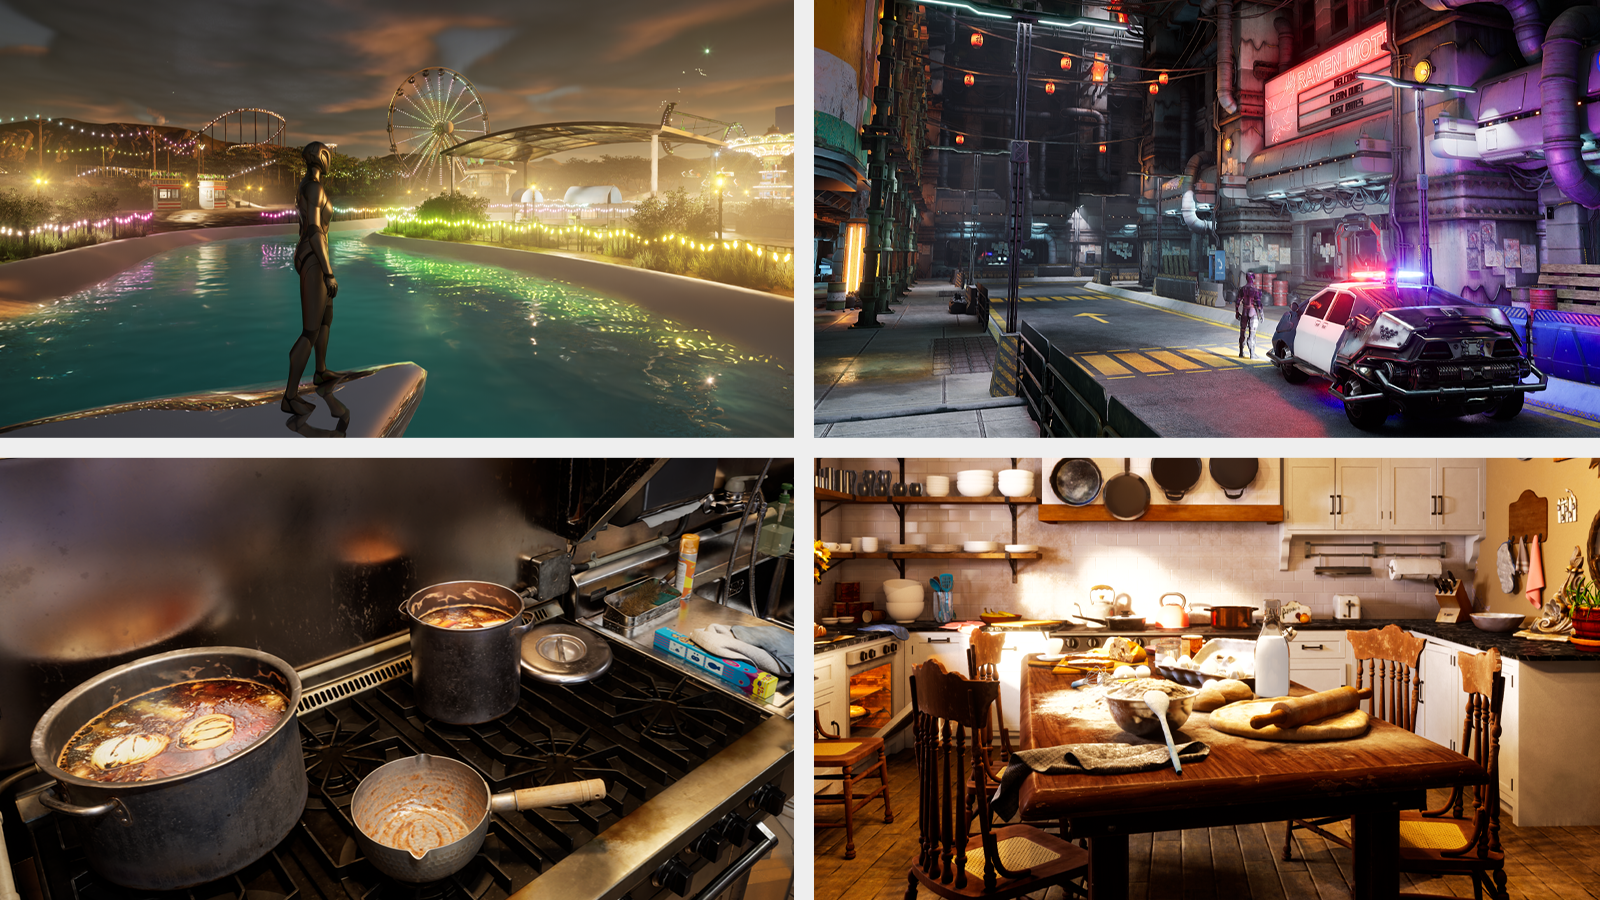
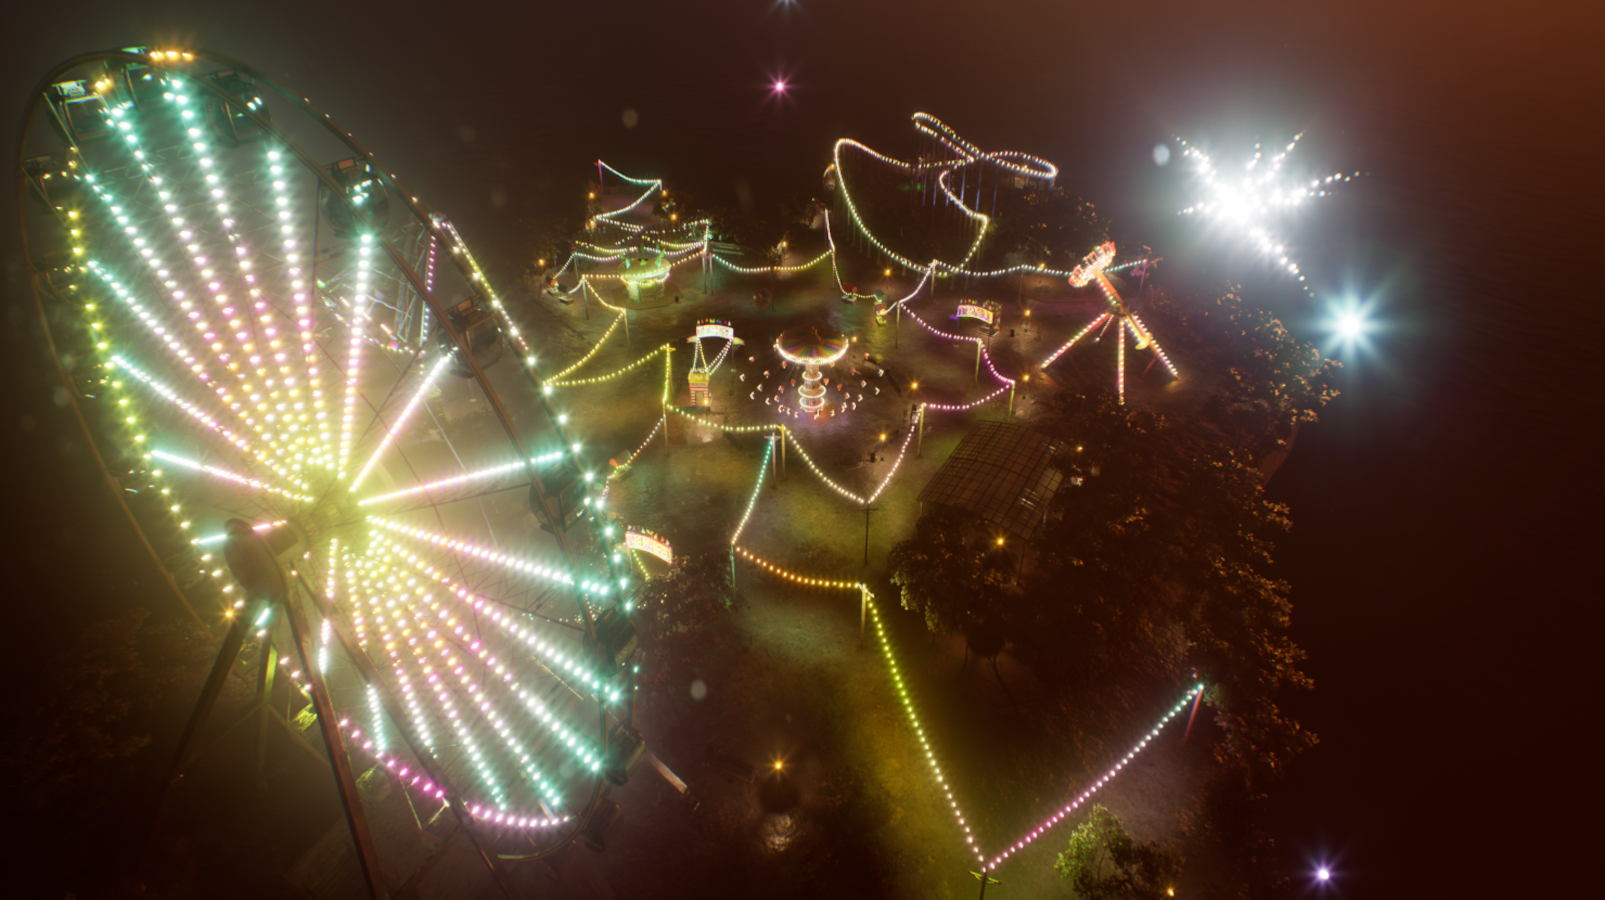
Using the stat gpu console command shows which ray traced effects are most expensive. Running the profileGPU or statistics console commands, such as stat LightRendering provide further information, displaying how many lights contribute to ray traced shadows. Figures 1 and 2 show images from the Soul City scene. The difference in settings (especially for lights) affects performance in significant ways.
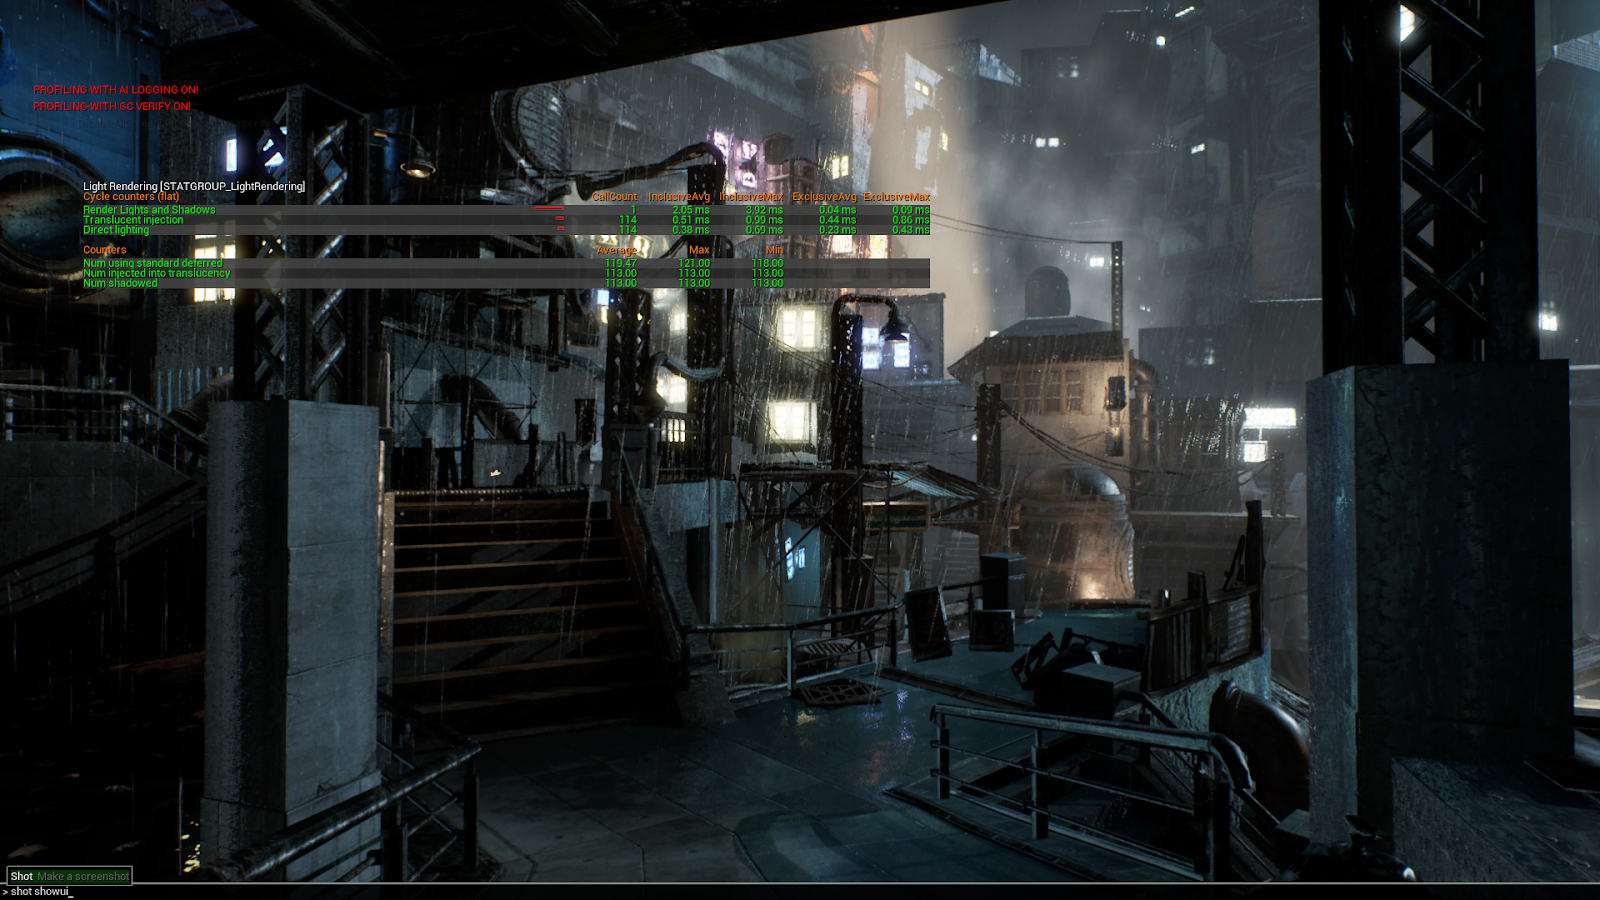

Although Soul City runs substantially slower with ray tracing enabled, its settings are completely unrealistic to efficiently render if rasterization is used instead. Rendering 113 dynamic shadow maps brings the framerate to a sub 5 FPS crawl, while with ray tracing these same 113 dynamic shadow casting lights runs over 30 FPS.
Finally, note that not all Unreal Engine features are currently compatible with ray tracing. Some Niagara material options are not supported with ray tracing (possibly generating shader compile errors from this). Some particle effects disappear if you turn on ray traced translucency. Epic also announced that ray traced landscapes will not be supported in the 4.22 release.
Ray Tracing Options
Out of the box, UE4 offers several CVars that enable your content to run dramatically faster or allow you to debug performance issues and artifacts. Some of these settings reduce quality or turn features off; some simply select a different algorithm with different tradeoffs.
General Settings
Use these to turn specific ray traced effects on and off.
r.RayTracing.Reflections [0|1]
r.RayTracing.Shadows [0|1]
r.RayTracing.AmbientOcclusion [0|1]
Material Sorting
Since ray traced reflections can be expensive, enabling material sorting may improve the cost of shading the reflected surfaces. Material sorting enables shading to be more efficient by sorting reflection shading work by material coherence. This comes with some cost overhead, so material shading is only a win when shading coherence is a limiter. Gains of 50% are not uncommon when enabling this feature.
r.RayTacing.Reflections.SortMaterials [0|1]
The Soul City sample is a good example of a case where the gains from material sorting are dramatic, improving performance by 3x in places.
Shadow Materials
The cost of evaluating materials when computing shadows with ray tracing can be significant when using masking in the shadow casting material. Disabling materials during shadow ray tracing makes the shadows less correct for some materials, but this option can help point out performance potholes for specific materials.
r.RayTracing.Shadows.EnableMaterials [0|1]
Reflection Screen Percentage
Reflections can be evaluated at a lower resolution to reduce the costs, with the denoising pass handling rescaling. Due to the discrete nature of sampling the GBuffer, this setting only supports integer fractions, and applies to both the x and y dimensions. The current available options are 100 and 50, where 100 represents the full screen resolution and 50 is a quarter of the number of samples (50% scaling on both axes).
r.RayTracing.Reflections.ScreenPercentage [50|100]
Maximum Roughness
This setting controls the maximum surface roughness for casting reflection rays. The higher the value, the more surfaces that receive glossy reflections and the more rays cast. The contribution of glossy reflections to the surface’s lighting will be minimal with higher roughness values, so setting this value lower can gain performance while having little visual impact on the scene. The default value is -1 and the threshold is driven by the post-processing volume settings (and defaults to 0.6 to match screen-space reflections)
r.RayTracing.Reflections.MaxRoughness [-1.0 | 0.0-1.0]
Samples Per Pixel
This setting controls how many rays cast from each pixel during ray tracing. The -1 default value means the value from the post-processing volume will be used. The more samples used, the higher the quality. However, this comes with a non-trivial cost as two samples nearly doubles the cost of one.
r.RayTacing.Reflections.SamplesPerPixel [0-N]
r.RayTacing.AmbientOcclusion.SamplesPerPixel [0-N]
r.RayTacing.Shadow.SamplesPerPixel [0-N]
Maximum Bounces
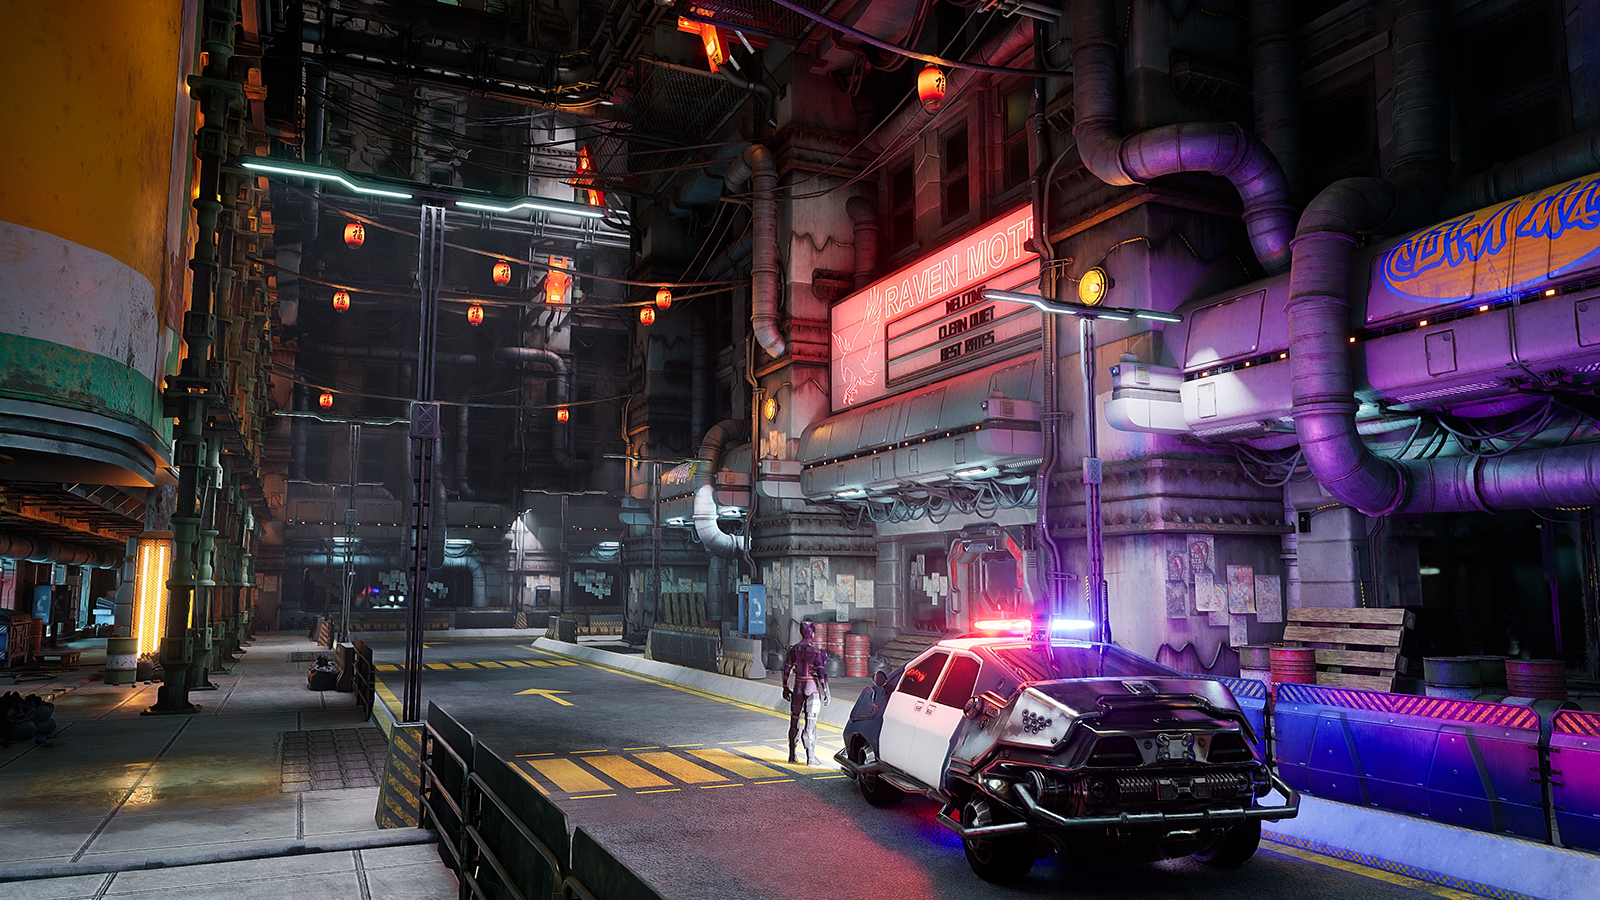
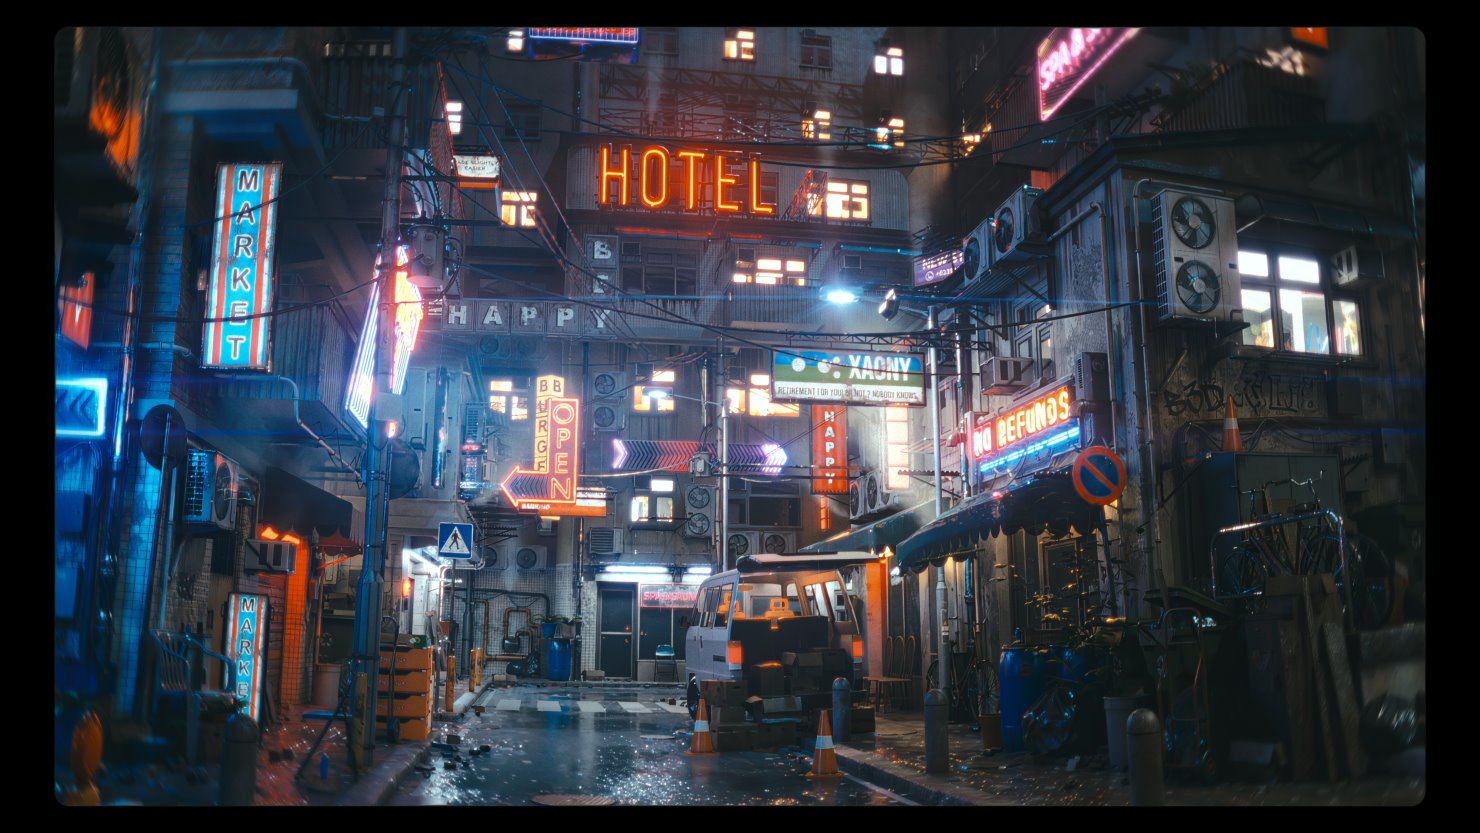
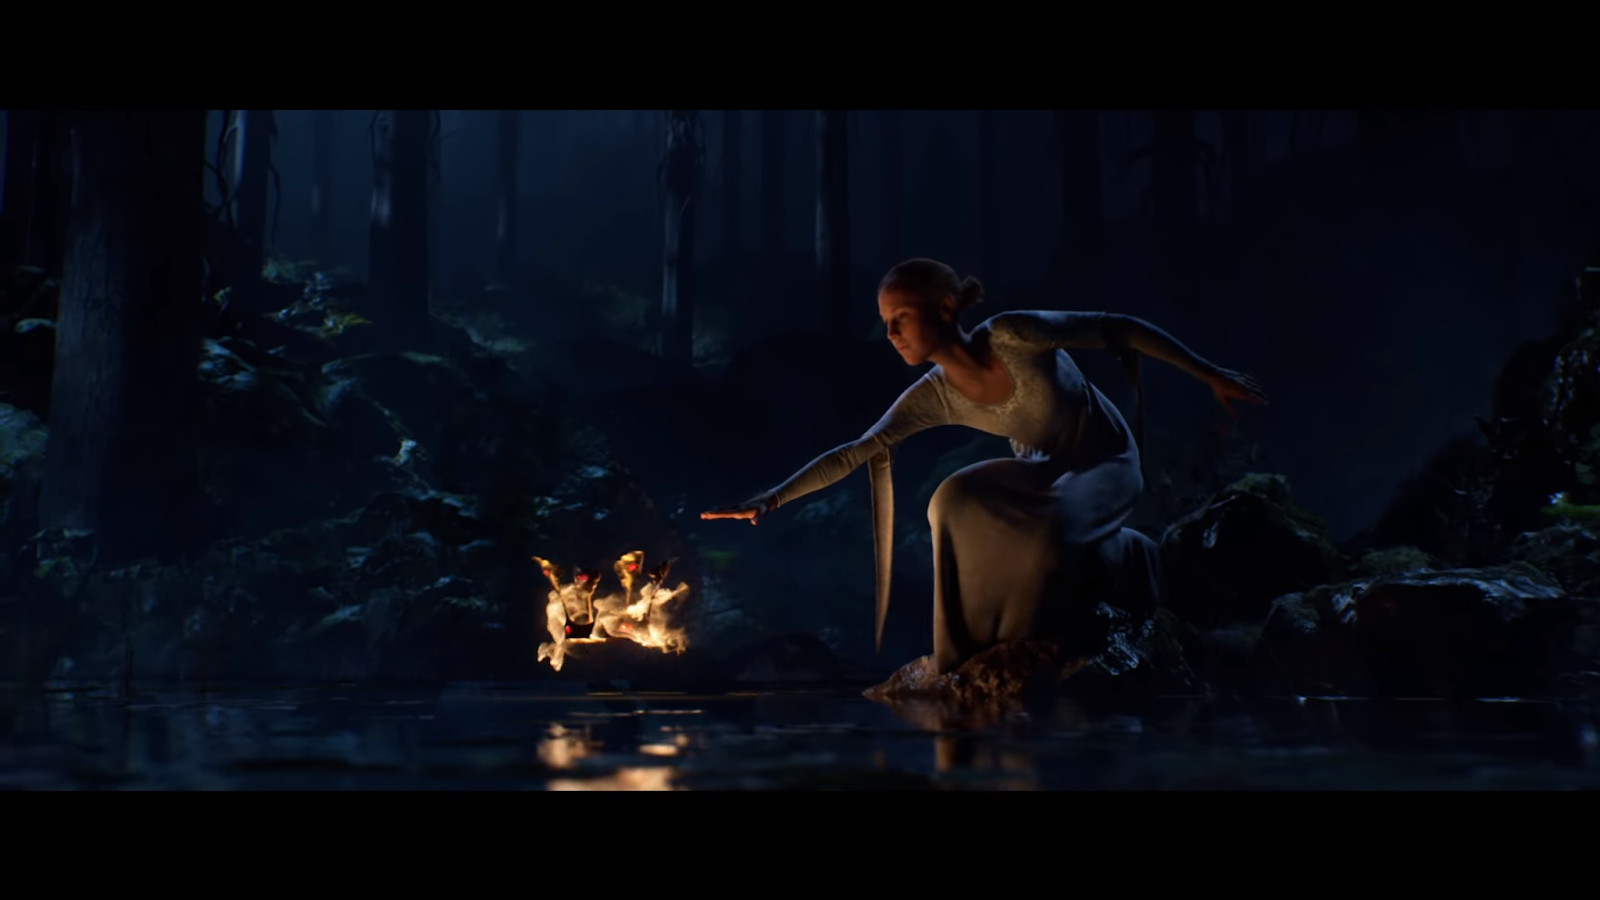
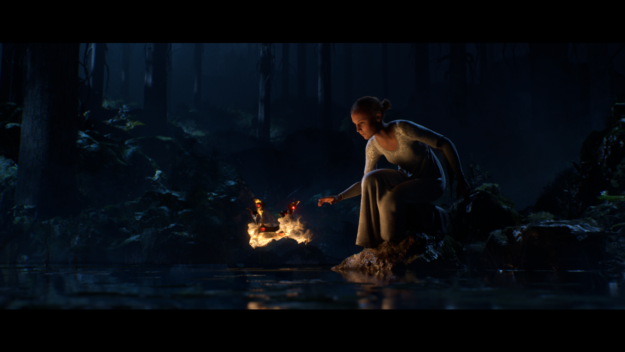
This setting controls the maximum number of times a reflection ray can bounce around the scene. Once the ray terminates, a reflection probe (cubemap) is sampled to include an approximate reflection contribution for the final bounce. The -1 default value means that, as with previous settings, the value set in the post processing volume will be used. The default in the post-processing volume is one bounce, which is appropriate for most content. The most common case where multi-bounce is necessary is looking at a mirror in the reflection of another mirror. Figure 3 shows a scene with single bounce reflections while figure 4 includes two bounce reflections.
r.RayTracing.Reflections.MaxBounces [0-N]

Minimum and Maximum Ray Distance
The minimum and maximum ray distance settings control the maximum distance a ray will be traced. The actual distance is a combination of the two based on surface roughness. Any ray that terminates before striking a surface samples the sky. Restricting maximum ray length reduces traversal time and increases performance at the cost of potentially missing intersections with geometry.
r.RayTracing.Reflections.MinRayDistance [0-N]
r.RayTracing.Reflections.MaxRayDistance [0-N]
Lighting in Reflections
The cost of lighting in reflections is adjusted by disabling components of the lighting applied to the reflections. For instance, shadowing and direct lighting can be disabled to understand their impacts. Generally, shadowing is the most costly component of shading reflections, direct lighting second, and the emissive/indirect term third, with very little cost.
r.RayTracing.Reflections.Shadows [0|1]
r.RayTracing.Reflections.DirectLighting [0|1]
r.RayTracing.Reflections.EmissiveAndIndirectLighting [0|1]
Height Fogging
This setting applies height fog from the scene to the rays computed during reflections.
r.RayTracing.Reflections.HeightFog [0|1]
Two Sided Geometry
Enabling two-sided geometry turns off backface culling in ray tracing, which can lead to faster traversal. However, disabling two sided geometry is more likely to match the results of rasterization, where a single sided piece of geometry would have been culled.
r.RayTracing.Shadows.EnableTwoSidedGeometry [0|1]
r.RayTracing.AmbientOcclusion.EnableTwoSidedGeometry [0|1]
Materials
This setting is a debug toggle that changes if ray tracing hit shaders evaluate materials when shading. Enabling and disabling material evaluation is helpful to understand the cost of materials and how material divergence contributes to the total cost of ray tracing.
r.RayTracing.EnableMaterials [0|1]
Force Opaque
This setting is a debug toggle of alpha masking when ray tracing. This helps quantify the impact alpha masking has on your scene. This is generally useful in determining the costs tied to DXR Any Hit shaders.
r.RayTracing.DebugForceOpaque [0|1]
Texture LOD
Material evaluation for ray tracing uses a distance-based level of detail metric to obtain an approximately correct texture MIP level for sampling. This setting toggles the use of this distance-based metric. When disabled, materials will instead uniformly use the most detailed texture MIP level (zero).
r.RayTacing.UseTextureLOD [0|1]
Normal Offset Bias
UE4 typically biases the start of the ray along the normal by a small amount when dispatching rays to avoid false self occlusions. This setting represents the furthest the ray origin is biased from the surface.The distance biased depends on how orthogonal to the surface the ray is.
r.RayTacing.NormalBias <float, default 0.1>
Tuning Your Content
All high-fidelity real-time graphics content requires art tuning to get great real-time performance. In addition to the settings above, several additional options exist at the content level to allow an artist or developer to tradeoff what is most important to their project.
Optimizing Shadows
Content can easily have dozens of lights (or more!). Previously, these lights had either entirely static or mostly static interactions with rasterization. These lights all trace fully dynamic shadows when ray tracing. If simple interactions were good enough on many of these lights when using rasterization, they probably don’t need the full ray tracing treatment. Although, the ray traced shadow cost is far less than the fully dynamic shadow map rasterization equivalent for many lights.
Optimizing Materials
The flexibility of artist-generated material graphs means that materials can be arbitrarily complex. When evaluating materials for reflections or opacity masks, this can create significant overhead. For example, the material graph shown in Figure 5 is for the couch in the Realistic Rendering sample and requires over 200 HLSL instructions to fully evaluate the material!

As the finest details often are often not discernable in reflections, using simplified materials is generally a good strategy. UE4 facilitates this with a new RayTracingQualitySwitch node in the material graph. This allows artists to provide a simplified version of portions of a material graph when using ray tracing hit shaders. We highly recommend using simplified expressions for the opacity mask when ray tracing, as these expressions may be evaluated many times (as DXR Any Hit shaders) in order to resolve coverage.
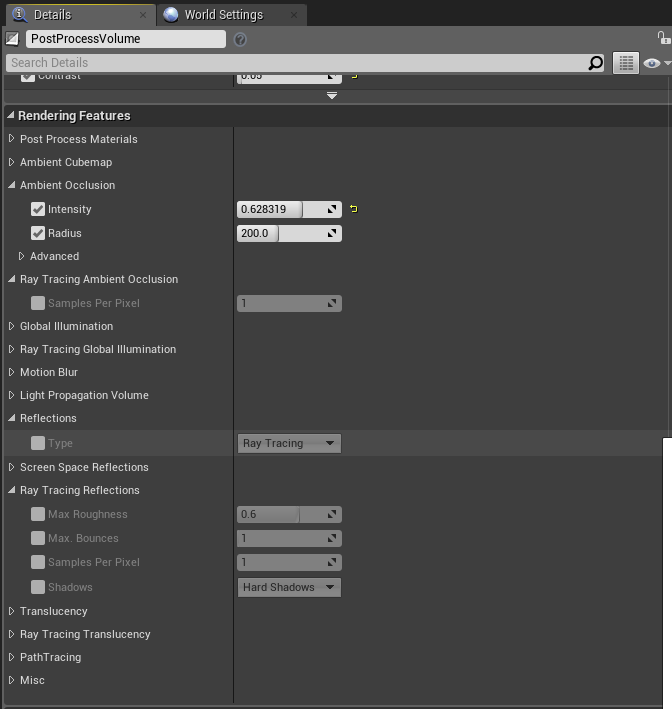
Post-Processing Volume
Many settings which impact ray tracing performance and quality are in the post-processing volume, as seen in Figure 6. This includes such features as:
- Maximum distance to evaluate ambient occlusion rays (shared with regular AO)
- Number of samples per pixel for ambient occlusion
- Maximum roughness to apply glossy reflections to
- Maximum number of bounces for reflections
- Number of samples per pixel for reflections
We expect single sample and single bounce to be the “sweet spot” for reflection image quality and performance tradeoffs when rendering in real time. It is rare to have a visual effect where an object can be seen clearly in a reflection of a reflection (2 ray traced bounces, 3 bounces from the camera). As a result, this setting can have a dramatic impact on performance.
Moving Forward
That wraps up our tips and tricks for taking advantage of ray tracing in UE4 4.22, which is currently in Preview and will launch in Final release soon. For the most part, you can just turn ray tracing on and see ray tracing effects in your UE4 content. Performance might not be optimal with default settings on untuned content, but, as we’ve seen, the engine already provides a large number of tools to tweak settings and content to improve on that. With this release, jumping into ray tracing is easier than ever!