What’s New with HPC Container Maker
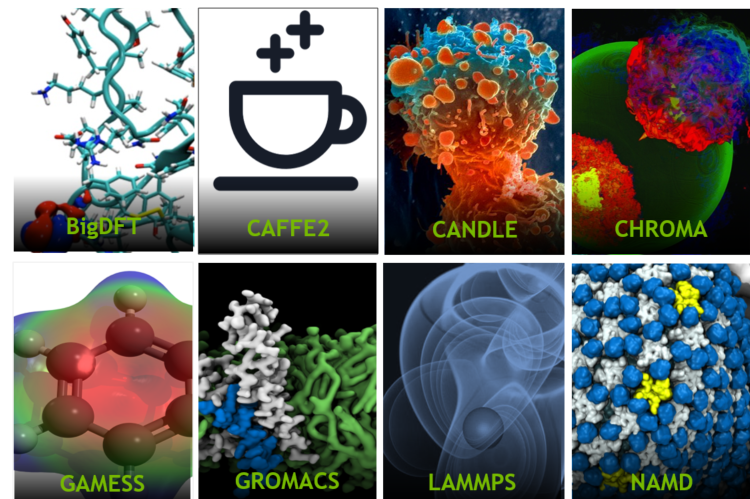
Whether you are a HPC research scientist, application developer, or IT staff, NVIDIA has solutions to help you use containers to be more productive. NVIDIA is enabling easy access and deployment of HPC applications by providing tuned and tested HPC containers on the NGC registry. Many commonly used HPC applications such as NAMD, GROMACS, and MILC are available and ready to run just by downloading the container image. If your application of interest is already available on NGC, you can skip to the “HPC, Simplified” section of this article and start using NGC.
If your application of interest is not available from NGC, you are not out of luck. HPC Container Maker (HPCCM) makes it easier to build your own container images for HPC applications.
HPCCM is useful for:
- Users who wants to build containers to make it easier to deploy their workloads on HPC clusters
- Application developers who are interested in distributing their software in a container to simplify life for their users and reduce your support overhead
- IT staff that needs to support a workload that is incompatible with their host software environment or tame the environment module complexity on the system.
My previous blog gives an overview of HPCCM, an open-source project that addresses the challenges of creating HPC application containers. HPCCM encapsulates into modular building blocks the best practices of deploying core HPC components with container best practices, to reduce container development effort, minimize image size, and take advantage of other container capabilities. To help you learn more about HPCCM and building HPC container images the NVIDIA Deep Learning Institute offers an online, self-paced course on High Performance Computing with Containers.
Lots of new features have been added since my previous blog about HPC Container Maker – let’s review what’s new.
What’s New with HPC Container Maker
Even easier to get started
First off, installing HPCCM is now even more convenient with Anaconda.
$ conda install -c conda-forge hpccm
Of course HPCCM continues to be available from PyPi as well.
$ pip install hpccm
Simplified multi-stage recipes
Multi-stage containers are an incredibly useful technique to control the size of container images as well as the container content. For instance, it’s unnecessary to redistribute the development environment or application source code as part of the container image. HPCCM has always supported multi-stage containers and there are 2 new multi-stage capabilities to note, simplified recipe syntax for runtime specification and Singularity’s recent support for multi-stage containers.
Previously every building block had to be manually included in the runtime stage by name. For example:
Stage0 += baseimage(image='nvidia/cuda:10.0-devel-centos7')
compiler = gnu()
Stage0 += compiler
mpi = openmpi()
Stage0 += mpi
…

Stage1 += baseimage(image='nvidia/cuda:10.0-runtime-centos7')
Stage1 += compiler.runtime()
Stage1 += mpi.runtime()
…
Now it’s possible to include all of the runtime components used in the build stage in a single step for simpler and more readable recipes. As always, the container build instructions generated for the runtime stage automatically reflect any building block configuration options specified in the first stage such as an alternative installation prefix.
Stage0 += baseimage(image='nvidia/cuda:10.0-devel-centos7')
Stage0 += gnu()
Stage0 += openmpi()
...

Stage1 += baseimage(image='nvidia/cuda:10.0-runtime-centos7')
Stage1 += Stage0.runtime()
...
Singularity version 3.2 added support for multi-stage container builds so multi-stage HPCCM recipes can also now be used with Singularity version 3.2 and later. However, the Singularity multi-stage definition file syntax is incompatible with earlier versions of Singularity so an additional HPCCM command line option must be specified in this case, --singularity-version=3.2. Without this flag HPCCM will generate a Singularity definition file compatible with all versions of Singularity but only based on the first stage of the multi-stage recipe.
Support for the latest Linux distributions and HPC components
While containers deployments are very flexible with respect to the Linux distribution – for instance Ubuntu container images can be run on CentOS hosts and vice versa – a very common container use case is for applications with requirements that can only be met by a particular Linux distribution version. Since HPCCM was originally released on GitHub, Ubuntu 18.04 and CentOS 8 have been released. Both are now fully supported by HPCCM, in addition to the previous Ubuntu 16.04 and CentOS 7. Where necessary HPCCM building blocks are distribution aware, and will generate different sets of container instructions based on the Linux distribution and version of the base image.
New and improved building blocks
Building blocks are core to HPCCM and separate the choice of what to install in a container from the details of how it’s done. The UCX and GDRCopy building blocks provide optimized communication layers for MPI. Matching the host InfiniBand driver to the OFED user space libraries in the container can be a challenge when deploying containers. The new multi_ofed building block installs multiple versions of the Mellanox OFED library as well as OFED packaged by the Linux distribution. A custom container entrypoint could then detect the host configuration and select the “best” OFED at container runtime. The NGC HPC container entrypoint uses an approach like this, combined with UCX and OpenMPI, to automatically select the optimal intra- and inter-node communication pathways based on the host system configuration.
Other recent HPCCM building block additions include Anaconda, Julia, Kokkos, and in-situ visualization (ParaView Catalyst, VisIt Libsim, and SENSEI). And all the building blocks are kept up-to-date as new component versions are made available.
New Sample Recipes
The sample recipes included with HPCCM have also been updated and expanded. A new non-traditional HPC recipe is the Jupyter notebook recipe. Given a Jupyter notebook file and optionally a pip requirements file or an Anaconda environment, this recipe generates the complete container specification file necessary to deploy your Jupyter notebook as a stand-alone container.
One Recipe, Multiple Targets
A key feature of HPCCM has always been the ability to generate either a Dockerfile or a Singularity definition file from the same recipe. You can also easily change the base image Linux distribution and have that automatically reflected in the generated container instructions. For example, here’s a very simple recipe that just installs the GNU compilers.
Stage0 += baseimage(image=USERARG.get('image', 'centos:7')
Stage0 += gnu()
The container specification format can be controlled with the --format command line option, set to docker to generate a Dockerfile (default) or singularity to generate a Singularity definition file. In this example, the base image can be set by the --userarg image=X command line option, where X is the base container image name and tag. Some examples, assuming the recipe file is named gnu.py.
$ hpccm --recipe gnu.py --format singularity --userarg image=ubuntu:18.04
$ hpccm --recipe gnu.py --format docker --userarg image=centos:8
More recently, experimental support has also been added for non-x86 architectures. HPCCM can generate Arm (aarch64) and Power (ppc64le) container specification files. Where necessary HPCCM building blocks are architecture aware, and will generate different sets of container instructions based on the CPU architecture of the base image. For example, the PGI building block will install the x86 or Power version of the PGI Community Edition compiler depending on the container architecture. A HPCCM building block for the Arm Allinea Studio compiler suite was also recently added to further support Arm-based containers.
The result is that a single HPCCM recipe can be used to generate multiple containers along the dimensions of CPU architecture, Linux distribution, and container specification format, in addition to easily varying the version of individual components.
LAMMPS, x86 and Arm in a single recipe
To illustrate these capabilities, let’s look at a recipe for LAMMPS below, a popular computational chemistry application. The recipe is a little lengthy, but is straight-forward. The recipe is a slightly simplified and updated version of the recipe used to build the NGC LAMMPS container. HPCCM is used to generate the container specifications of nearly all the NGC HPC containers. In fact, you can find the HPCCM recipe used to generate a NGC container in /usr/src in some of the most recent HPC containers such as HOOMD-blue.
The LAMMPS recipe is a multi-stage recipe; that reduces the Docker image size from ~ 4 GB for the build stage with the full development environment to ~ 360 MB for the final container image with just the application binary and the necessary runtime dependencies, a ~10X size reduction. This is a huge advantage when downloading the image or storing it on disk on your cluster.
The recipe provides user arguments to specify the CPU and GPU architectures, for example X86 and Turing or Arm and Volta. The CUDA for Arm base images are currently available on NGC as early access previews and require special access. The NGC HPC container images typically include builds for multiple GPU architectures and the entrypoint dynamically selects the appropriate one based on the deployed hardware configuration for optimal performance. An alternative approach is to generate a single “fat” binary that supports multiple architectures, although not all application build systems support this (Kokkos which is used by LAMMPS does not). Modifying the recipe to support multiple GPU architectures in a single container image is left as an exercise to the reader.
The general recipe flow is to first setup the development environment in the build stage: a compiler and build tools such as CMake, communication libraries like UCX and GDRCopy, and an MPI library. These steps are made straight-forward one-liners by using the appropriate HPCCM building blocks. In this case, there is a little variation in order to support both Arm and x86 architectures, such as using GDRCopy on x86 but not Arm, but most of the differences are internalized in the building blocks and automatically handled for you. For instance, the Mellanox OFED building block automatically generates the appropriate instructions to download and install the Arm or x86 Mellanox OFED binaries.
UCX is used with OpenMPI to automatically detect and use the optimal communication paths to share data between GPUs and across nodes in a multi-node run. The LAMMPS recipe below uses Mellanox OFED version 4.6 whereas the NGC container includes multiple versions and the container entrypoint automatically uses the one that best matches the host platform InfiniBand driver. NGC containers may also use patched versions of components like UCX to work around specific known issues while this recipe sticks to released versions of all the components. This LAMMPS recipe is also available as part of the HPCCM GitHub repository and will be updated as these workarounds are merged and available in stable component releases. Consequently, this container may not perform at the same level as the NGC container or may have issues in some corner cases. Thus, when available, NGC containers that are fully optimized and validated are strongly preferable to building your own container image.
The longest part of the recipe is the LAMMPS section itself because the build instructions need to be fully written out. Some expertise is needed, but the good news is that expertise is embedded into the container so others can easily benefit from your effort when deploying the resulting container.
The second, or runtime, stage of the recipe is short and simple, but essential to the container image size reduction described above. It copies the runtimes for all the components used in the build stage as well as LAMMPS itself into the final container image.
########
# LAMMPS recipe
#
# User arguments:
# arch: x86_64 or aarch64 (default: x86_64)
# build_image
# gdrcopy (default: 1.3)
# gpu_arch: Pascal60, Volta70, or Turing75 (default: Volta70)
# knem (default: 1.1.3)
# lammps_version (default: patch_19Sep2019)
# mlnx_ofed (default: 4.6-1.0.1.1)
# ompi (default: 4.0.2)
# qemu (default: False)
# runtime_image
# ucx (default: 1.6.1)
########

from distutils.version import StrictVersion
import hpccm.version

if StrictVersion(hpccm.__version__) < StrictVersion('19.11.0'):
 raise Exception('requires HPCCM version 19.11.0 or later')

# Use appropriate container base images based on the CPU architecture
arch = USERARG.get('arch', 'x86_64')
if arch == 'aarch64':
 # Early Access images - NGC registration required to use
 default_build_image = 'nvcr.io/ea-cuda-sc19/arm-partners/cuda-aarch64:10.2-devel-ubuntu18.04'
 default_runtime_image = 'nvcr.io/ea-cuda-sc19/arm-partners/cuda-aarch64:10.2-base-ubuntu18.04'
elif arch == 'x86_64':
 default_build_image = 'nvidia/cuda:10.1-devel-ubuntu18.04'
 default_runtime_image = 'nvidia/cuda:10.1-base-ubuntu18.04'
else:
 raise Exception('unrecognized architecture: {}'.format(arch))

########
# Build stage (Stage 0)
########

# Base image
Stage0 += baseimage(image=USERARG.get('build_image', default_build_image),
          _arch=arch, _as='build')

if arch == 'aarch64' and USERARG.get('qemu', False):
 # Install QEMU emulator for aarch64 container image builds on x86 systems
 Stage0 += copy(_from='multiarch/qemu-user-static',
         src='/usr/bin/qemu-aarch64-static', dest='/usr/bin')

# Base development environment
Stage0 += gnu(version='8')
Stage0 += cmake(eula=True)

# Communication stack: OpenMPI + UCX + KNEM + Mellanox OFED + gdrcopy
# (x86 only)
Stage0 += mlnx_ofed(version=USERARG.get('mlnx_ofed', '4.6-1.0.1.1'))

if hpccm.config.g_cpu_arch == hpccm.config.cpu_arch.X86_64:
  Stage0 += gdrcopy(ldconfig=True, version=USERARG.get('gdrcopy', '1.3'))

Stage0 += knem(ldconfig=True, version=USERARG.get('knem', '1.1.3'))

Stage0 += ucx(knem='/usr/local/knem', ldconfig=True,
       version=USERARG.get('ucx', '1.6.1'))

mpi = openmpi(ldconfig=True, version=USERARG.get('ompi', '4.0.2'),
       ucx='/usr/local/ucx')
Stage0 += mpi

########
# LAMMPS
########
gpu_arch = USERARG.get('gpu_arch', 'Volta70')
if gpu_arch not in ['Pascal60', 'Volta70', 'Turing75']:
 raise Exception('unrecognized GPU architecture: {}'.format(gpu_arch))

lammps_version = USERARG.get('lammps_version', 'patch_19Sep2019')
compute_capability = 'sm' + gpu_arch[-2:]
tarball = '{}.tar.gz'.format(lammps_version)
srcdir = '/var/tmp/lammps-{}'.format(lammps_version)

Stage0 += comment('LAMMPS version {0} for CUDA compute capability {1}'.format(
 lammps_version, compute_capability))

# LAMMPS dependencies
Stage0 += apt_get(ospackages=['bc', 'git', 'libgomp1', 'libhwloc-dev', 'make',
               'tar', 'wget'])

# LAMMPS build
Stage0 += generic_cmake(
 build_directory='{0}/build-{1}'.format(srcdir, gpu_arch),
 cmake_opts=['-D BUILD_SHARED_LIBS=ON',
       '-D CUDA_USE_STATIC_CUDA_RUNTIME=OFF',
       '-D KOKKOS_ARCH={}'.format(gpu_arch),
       '-D CMAKE_BUILD_TYPE=Release',
       '-D MPI_C_COMPILER={}'.format(mpi.toolchain.CC),
       '-D BUILD_MPI=yes',
       '-D PKG_MPIIO=on',
       '-D BUILD_OMP=yes',
       '-D BUILD_LIB=no',
       '-D CMAKE_CXX_COMPILER={}/lib/kokkos/bin/nvcc_wrapper'.format(srcdir),
       '-D PKG_USER-REAXC=yes',
       '-D PKG_KSPACE=yes',
       '-D PKG_MOLECULE=yes',
       '-D PKG_REPLICA=yes',
       '-D PKG_RIGID=yes',
       '-D PKG_MISC=yes',
       '-D PKG_MANYBODY=yes',
       '-D PKG_ASPHERE=yes',
       '-D PKG_GPU=no',
       '-D PKG_KOKKOS=yes',
       '-D KOKKOS_ENABLE_CUDA=yes',
       '-D KOKKOS_ENABLE_HWLOC=yes'],
 directory='{}/cmake'.format(srcdir),
 # Force CUDA dynamic linking, see
 # https://github.com/openucx/ucx/wiki/NVIDIA-GPU-Support
 preconfigure=['sed -i \'s/^cuda_args=""/cuda_args="--cudart shared"/g\' {}/lib/kokkos/bin/nvcc_wrapper'.format(srcdir)],
 prefix='/usr/local/lammps-{}'.format(compute_capability),
 url='https://github.com/lammps/lammps/archive/{}'.format(tarball))

########
# Runtime stage (Stage 1)
########

Stage1 += baseimage(image=USERARG.get('runtime_image', default_runtime_image))

# Build stage runtime support + LAMMPS
Stage1 += Stage0.runtime()

########
# LAMMPS
########
Stage1 += environment(variables={
 'LD_LIBRARY_PATH': '/usr/local/lammps-{}/lib:$LD_LIBRARY_PATH'.format(
  compute_capability),
 'PATH': '/usr/local/lammps-{}/bin:$PATH'.format(compute_capability),
 # Workaround, see https://github.com/openucx/ucx/wiki/NVIDIA-GPU-Support
 'UCX_MEMTYPE_CACHE': 'n'})
Assuming the recipe is named lammps.py, you can generate Dockerfiles or Singularity definition files for any CPU and GPU architecture combination.
$ hpccm --recipe lammps.py
$ hpccm --recipe lammps.py --userarg arch=aarch64
$ hpccm --recipe lammps.py --format singularity --userarg arch=x86_64 gpu_arch=Turing75
Given the container specification file, you can build the container image using docker build or singularity build. Note that to actually build the container image you should be on a system of the same CPU architecture.
HPC, Simplified
There are lots of other recent container highlights and developments besides HPCCM.
First and foremost is the announcement of NGC containers based on the Arm architecture. All the benefits of HPC containers on NGC for x86, validated and optimized application containers, are now also available for Arm-based systems. The HPCCM capabilities described in the previous section helped port the NGC HPC containers to Arm while maintaining a single recipe code base.
A Julia container has also been added to NGC, making it easier than ever to use GPU accelerated Julia. Julia combines the interactive fast prototyping and development of dynamically typed scripting languages with the performance of strongly typed compiled languages. (By the way, MIT’s and Julia Computing’s Alan Edelman was recognized at SC19 with the Sidney Fernbach award for co-creating Julia.)
All the HPC containers on NGC support Singularity and many include instructions for how to run on multiple nodes using a cluster resource manager such as SLURM or PBS (for example NAMD). The webinar Scaling Out HPC Workflow with NGC and Singularity goes further into the details of how to scale out NGC containers on clusters.
NGC is continually updated with new container images. The NGC Container Replicator makes it possible for IT staff to easily create a local synchronized mirror of all or part of the NGC container registry, even automatically converting the images to the Singularity image format if desired. It can also be used to make NGC containers available on an air-gapped system.
NVIDIA has also demonstrated how you could possibly integrate containers directly into SLURM using Pyxis to even further simplify HPC container deployments.
To help bridge the gap between existing deployments based on environment modules and containers, the open source Community Collections project from John Hopkins University integrates containers with environment modules. For instance, loading the “namd” environment module will transparently download the NAMD container from NGC and alias the “namd2” command on the host to automatically invoke the corresponding command inside the NAMD Singularity container.
Whether you are a research scientist, application developer, or IT staff, the bottom line is the same: containers help democratize HPC and enable faster and more reproducible science. NGC should be your first stop to get the latest optimized and validated software for GPU-accelerated systems. In the event the software you need is not available from NGC, HPC Container Maker makes it easier to create your own container images. In either case, NVIDIA has solutions to help you deploy containers at scale and increase your productivity.